
Let’s look at how to use the Bonmac Dripper. This is a standard wedge-shaped coffee maker, with a single hole to drain the coffee. There are some nuances when using this dripper tough, so here’s the complete guide in making your favorite cup of coffee with this maker.
For this instruction, we are using a Bonmac Dripper CD-1, which can brew 1-2 cups of coffee. For the CD-2 version, which brews 2-4 cups of coffee, there will be added information after the brewing steps below to serve as a guide.
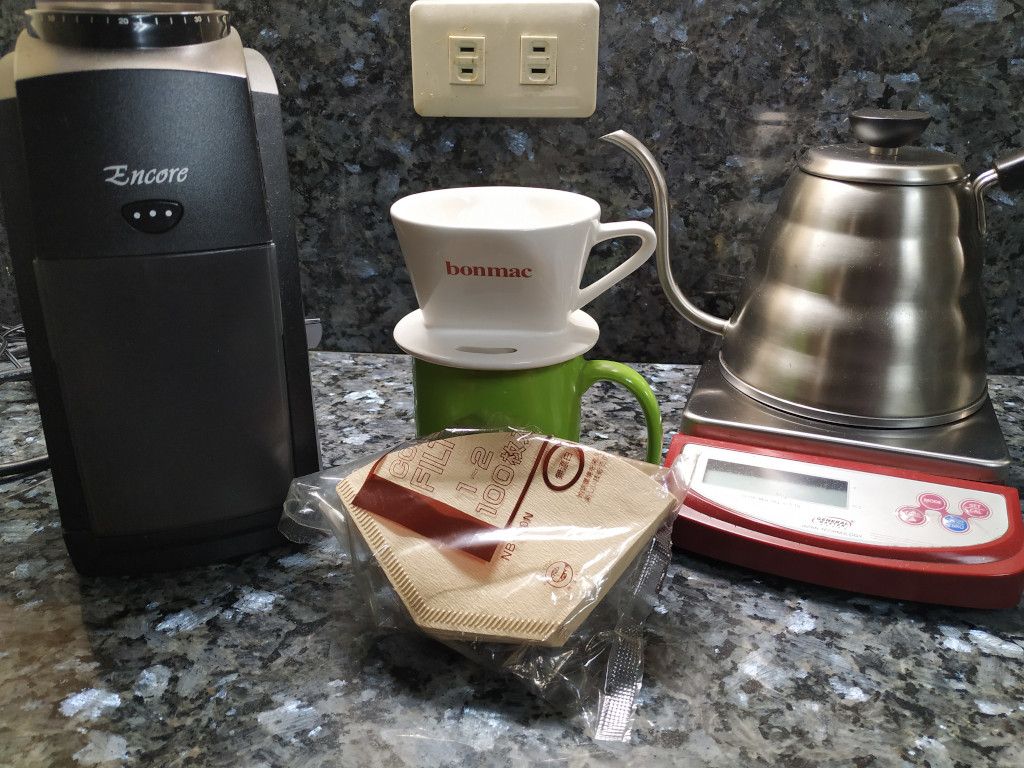
Things that You Need
Drip coffee makers use the same equipment. Here’s the list of all the things that you’ll need:
- Kettle to boil your water
- Grinder to grind your coffee (burr grinder preferred to blade grinder)
- Weighing scale to have the exact amount of coffee beans and water
- Bonmac Dripper, the star of our article
- #1 Filter Paper (make sure it fits evenly on the ridges)
- Coffee cup, mug, or carafe
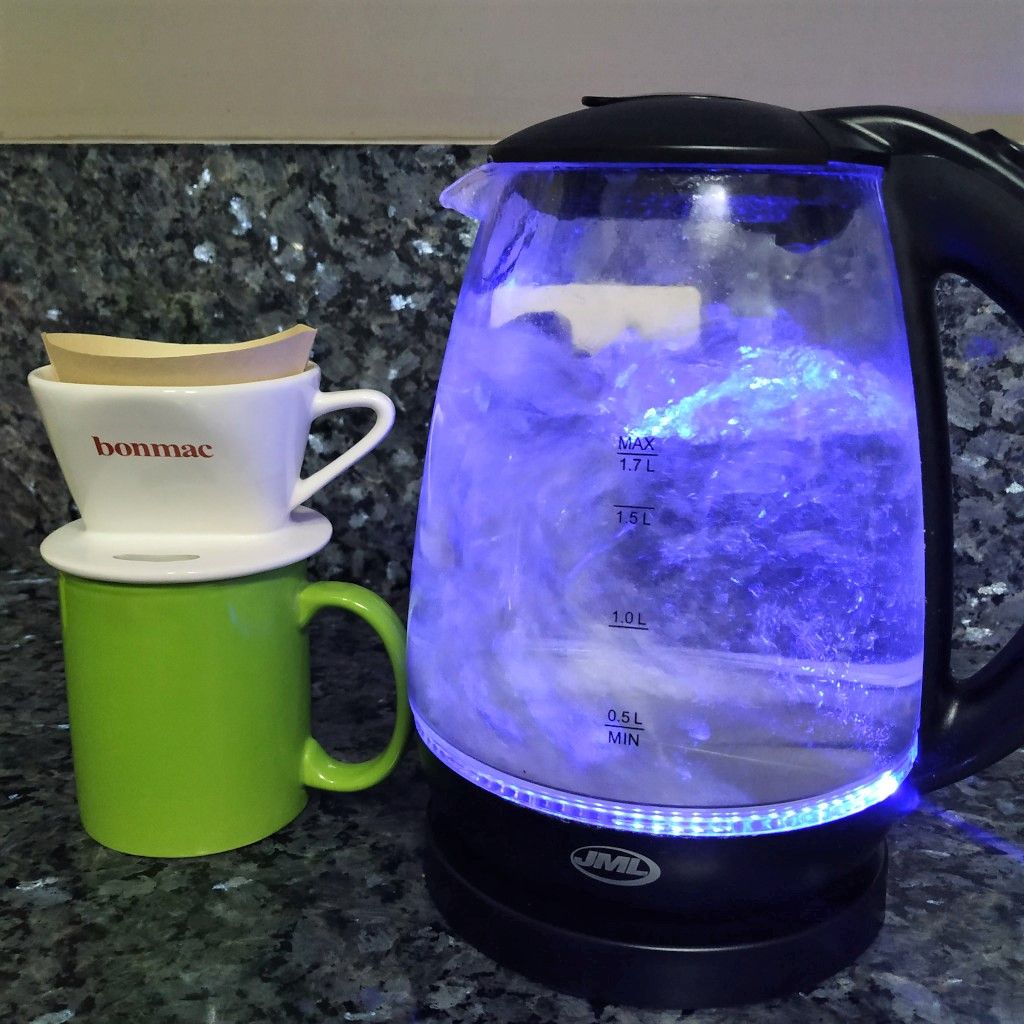
Step 1 Prepare the Whole Setup
This step is done by boiling the water and placing the filter correctly inside the Bonmac Dripper.
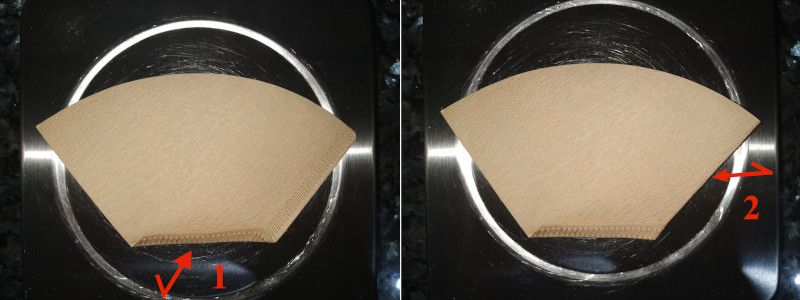
Remember to fold the lower fold of the filter first. Then fold the side fold in the opposite direction, as shown in the picture below.
Step 2 Preheat the Gooseneck Kettle and the Dripper
Place a few grams of water into the gooseneck kettle to heat it up. After about 30 seconds, or when you feel that the kettle is warm enough, gently pour the water from the kettle to the ridges of the dripper. The paper filter will get wet in this process. If you need to heat up the dripper more, you can pour the water that is inside the mug into the dripper again before discarding the water completely.
Discard the water from the cup/mug/carafe after preheating the Bonmac dripper. This will save you from making the overflow mistake I’ve made in the past. The overflow mistake happens when the coffee brew mixes with the preheated water in the mug, overflowing the water out of the mug and into the weighing scale. Aside from ruining a great batch of coffee, that was also quite a mess I had to clean up.
Also, add water back into the gooseneck kettle at this point, or you’ll find yourself scrambling to do this in later stages of your brew.
Step 3 Grind the Beans
This is where the technical aspects of brewing with the Bonmac Dripper come into play. First, you should know your starting grind size when opening a bag of freshly roasted coffee beans. Below is a table that could help you start out.
| Roast | Grind Description | Volume | Grind Size on Baratza Encore | Brewing Time |
| Medium | One click more than medium fine | 300ml or a mug | 16 | 2:10 – 2:30 |
| Dark | Medium | 300ml or a mug | 20 | 2:10 – 2:30 |
If you have other measurements that you need to use (example: brewing a 360ml batch of coffee for 2 cups), use the widely accepted ratio of 1 gram ground coffee is to 15 grams water. So, for a 360ml batch of coffee, you’d want to start with 24 grams of ground coffee(360ml / 15grams). Also, since you’re brewing more volume of coffee, make sure to stay with medium grind (20/40 on the Baratza Encore), or add one additional click coarser grind (21/40 on the Baratza Encore).
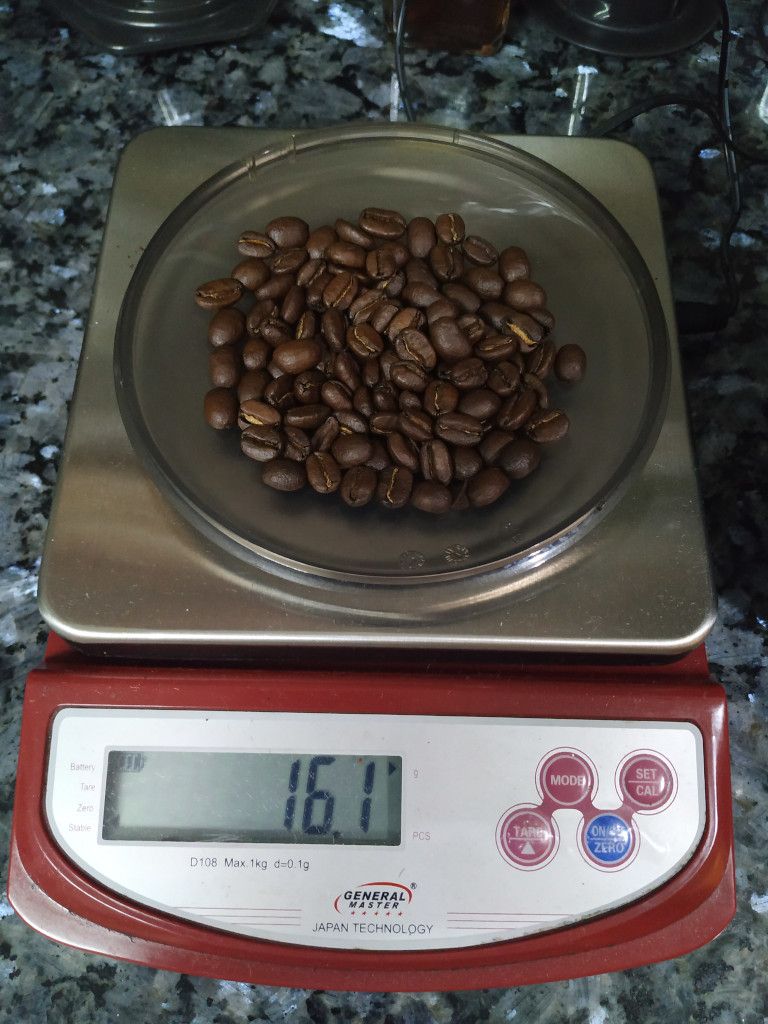
You can slowly change your settings as you brew more times to see your preference. Remember that each bag will most likely have a different optimal taste to grind size ratio. To share my latest experience with a semi dark roasted Colombian coffee: I am using a grind size of 2 clicks below medium on my Baratza Encore (18/40). And also, I am only using 16 grams of coffee beans, instead of 20 grams, for a mug or 300ml of coffee. The semi dark roast allows me to use lesser beans, while maintaining the same water volume. The taste is a heavy bold coffee taste without the gritty aftertaste. If I used 20 grams of coffee with medium grind size (20/40 on the Baratza Encore), the taste profile will be a medium boldness with a hint of berries in the flavor. It really depends on the person’s taste preference.
Don’t worry on how to start, just start with the chart shown above, and slowly adjust as you brew cup after cup.
Step 4 Pour the Ground Coffee into the Bonmac Dripper
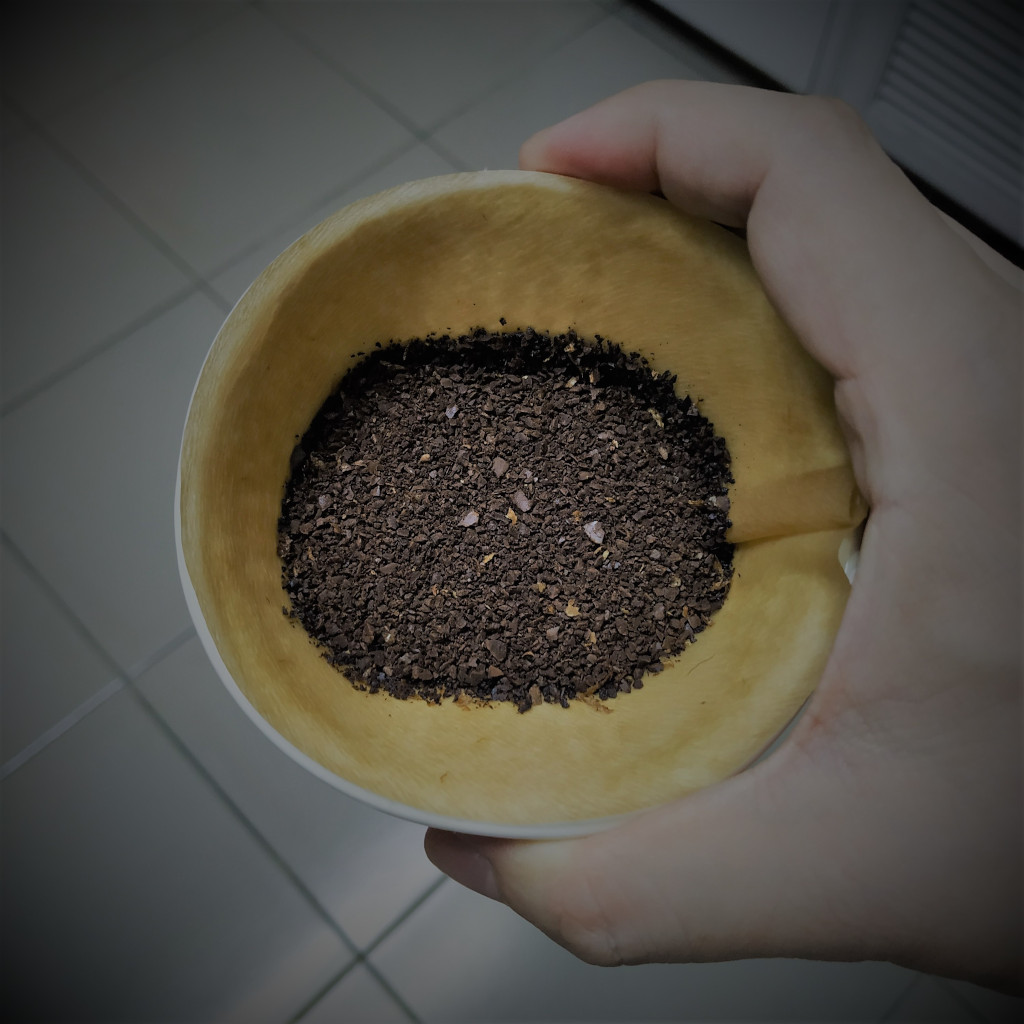
Here’s a link to the original image to help you zoom in and eyeball the 18/40 grind size that I use.
For more information on grind sizes, check out this article.
Step 5 Tare Your Scale
This seems like an obvious step, but I’ve made so many mistakes in forgetting to tare the scale, and got lost in the process as I started brewing the coffee. Some weighing instruments only allow 1 kilogram in total weight. A trick I use is to place the mug (or carafe) with the Bonmac dripper and filter on the weighing scale, and then turn off the weighing scale. Turn it on again, and you’ll start with a weight of zero. Now you can brew up to 1 kilogram of water.
Step 6 Add 10% of Total brew target into the Bonmac Dripper
Other baristas call this phase “Blooming the Coffee”. If you are targeting to make a mug (300ml) of coffee, pour an initial 30mL, and leave it to de-gas for 30 seconds. This is an important stage so that there will be no gases left in the coffee when you continue your brew.
Take note that not all coffee roasts bloom, or have that bubbling effect. Freshly roasted beans will tend to give off a lot of gas, making the bloom higher. As your pack of coffee ages, you will notice the bloom becoming smaller in time, until there is no more bloom.
I use the bloom as a gauge as to how fresh the pack of coffee is. Generally, start brewing coffee about 4 to 7 days after it’s been roasted, and try to finish it within a month of opening. This will ensure that you get the best quality out of your coffee beans, and the best taste out of your cup.
Step 7 Pour in the Remaining 90% Until You Reach the Brew Target
After 30 seconds, start pouring in the remaining 90% of your total target. If you’re looking at 300 ml, then slowly add water until you reach 300 ml.
The best way to pull this off with the Bonmac Dripper is either of the two options:
- add water at a slow, steady stream, keeping the brewing level close to about four fifth level of the brewer, until you reach the 300ml target; or
- add water a little faster, stopping at the four fifth level, then allow it to drain down a little before adding water again.
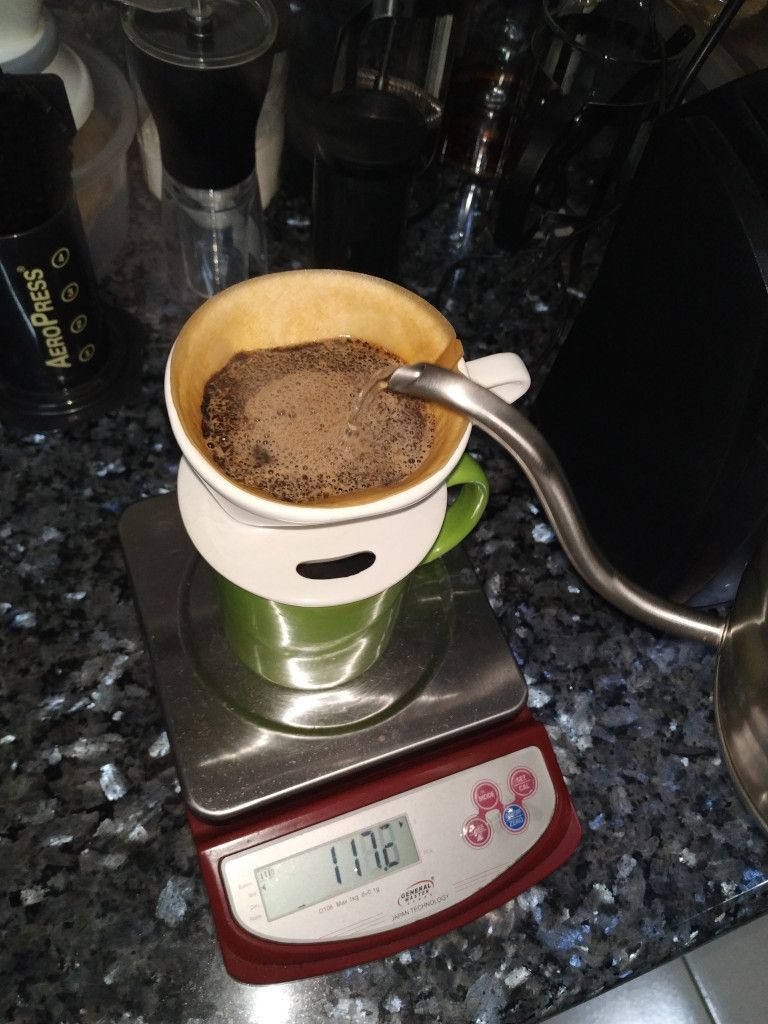
Your target brew time for a mug (300ml) of coffee using the Bonmac Dripper will be 2 minutes 20 seconds. Don’t worry if your brew time is 10 seconds less or more, it shouldn’t affect the taste of the coffee much. In my experience, the Bonmac Dripper creates consistent cups or mugs of coffee from brew to brew, using the same grind size and amount of coffee grounds.
Step 8 Take the Dripper Off and Enjoy
Here’s the part that we’ve all been waiting for. Just take the dripper off, let the coffee settle for a while, and then enjoy the greatness that comes with your own effort in making this batch of coffee. It would be even better if you can enjoy it with family and friends. I enjoy making coffee most when I have a bunch of family or friends over and we can share in some wonderful coffee. Of course, they all say it tastes great!
Using the Larger Bonmac Dripper CD-2 for 2-4 cups of Coffee
To make this fantastic mug of coffee, I used a Bonmac Dripper model CD-1. This is a dripper meant to make only 1-2 cups of coffee. This is perfect if you brew everyday for only 2 people. But if you brew for more, you’d want to consider using the model CD-2 instead, which brews for 2-4 people.
Assuming that we are still brewing a mug (300ml) of coffee, the mechanics will change a little when you use the Bonmac Dripper CD-2. You can use the same grind size as above in making the brew, but you’ll only fill the water until half of the brewer, this will make sure that the water doesn’t drain out too fast and give you an underwhelming coffee taste.
When brewing a larger batch of coffee, you can use the usual ratio discussed above of 1 gram ground coffee to 15 grams water. So making 3 cups of coffee will need 36 grams of ground coffee, and making 4 cups will need 48 grams to start out with.
As for the grind size, I must admit that this is not much of my forte since I mostly brew for 1 mug or 2 cups, but having some experience with the Kalita 102, I could give an opinion on the grind size.
- For 3 cups of coffee or 540ml, go for 1 or 2 clicks coarser than medium (21-22/40 on the Baratza Encore).
- For 4 cups of coffee or 720ml, go for 2 or 3 clicks coarser than medium (22-23/40 on the Baratza Encore).
Again, the figures stated above are just my opinion based on a similarly sized maker (Kalita 102), but if anyone has more experience on the grind size for such brews using the Bonmac Dripper CD-2, I would really appreciate you leaving a comment below.
Finally, for your target brew time with more cups, add about 20 seconds per cup of coffee. Since the Bonmac Dripper drains quite fast, you’d want to keep the coffee grounds submerged for as much as possible.
And there it is! That brings us to the end of our Bonmac Dripper guide. I hope you have found this article useful. I really enjoy using the Bonmac Dripper, and it’s always my go-to dripper. If you’re looking around and would want to know more about the Bonmac Dripper, check out my review right here.
Thank you for taking the time in reading. Feel free to leave your comments below, and I’ll see you on the next article!
Hi,
So I have been using my Bonmac for the last year and have only recently put together that I’m working with the CD2, not the CD1. However, I’ve been brewing using your recipe outlined above. I make my cup using the 20g/300ml ratio, and then one for my wife. The coffee seems to be fine, but I’m wondering if I can do even better. Would you recommend changing anything for making just 1 mug of coffee (300ml) using the CD2?
Hi Mark,
Thank you for looking up the information on my site. Here’s some of my thoughts on how to help you out on that.
1) Grind Finer Coffee Grounds. Each time you make a mug, grind one click lower so it’ll make the coffee a little stronger. You’ll get stronger tasting coffee the finer your grind becomes.
2) Utilize Only Half to Three Fourths of the Coffee Dripper. Use a lower level and don’t pour until the brim of the coffee dripper. This will optimize the brew ratio of water to ground coffee in the dripper.
3) Pour Slower. Pour slower with your gooseneck kettle and try not to agitate the beans. So all the water passes through the beans at the bottom and extract as much taste from the coffee as possible.
4) Type of Filter Used. Are you using paper filter or cloth filter? Cloth filters will tend to let the water pass through the beans really fast, so you’ll need to grind to an almost espresso size grind (about 5 or 6, out of 40 on the Baratza Encore). If you use a paper filter on the other hand, it’ll be slower, but you’ll need a larger grind size (about 12 out of 40 on the Baratza Encore). These are my settings, feel free to use them as a reference on your grinder.
Those are the 4 things that I would do. Take note that changing 1 of these will give you longer brewing times, so you only need to change them one at a time. Good luck and I hope you’ll get to brew some stronger coffee to your liking.
Thanks so much for the help! I’m using #2 paper filters. I poured slower and only utilized half the dripper (great tip). Last question I’d ask is: do you have an estimate for how long the brewing process should take me doing it this way (given that I’ll still be pouring 10% of the water and leaving it for 30 seconds to bloom)?
Hi Mark!
Thank you for your reply. I’m glad the tips have helped. I hope that you are slowly achieving the taste profile of the coffee that you want.
As for how long the brewing process should take. You want to achieve a brewing time anywhere between 2 minutes 30 seconds to 3 minutes, preferably reaching nearer to 3 minutes for a stronger brew.
One last tip (but I’m quite certain you’re doing this already). Make sure to preheat the dripper before you brew by pouring the hot water used to heat up the gooseneck kettle on the sides of the dripper, then allow the water to slowly drain out from it. To make it heat up even more, you can pour the preheated water that has come down to the mug on the dripper again before you discard the water. BUT please be very careful not to burn yourself in this process. A well heated dripper will brew coffee really well. A cold dripper will suck up all the heat of the water and give you a flat tasting brew. So I always make sure that the dripper is really hot before I brew.
I hope this will all help Mark! Feel free to get back to me if you have any questions.