
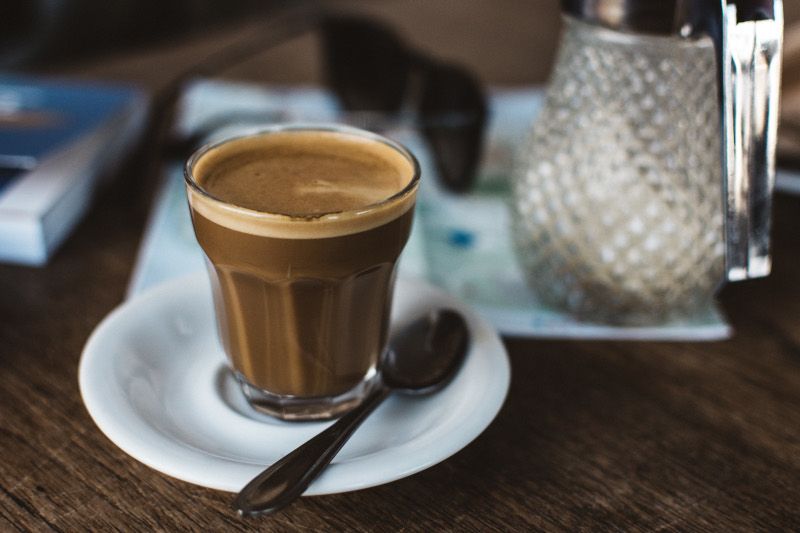
I remember when I started making brewed coffee at home some years ago. As a beginner, my brews were wildly inconsistent. Sometimes I got really good cups of coffee; but other times, they were really bitter. Which made me question my skills and ask myself, “Why does my brewed coffee taste so bitter?”
With experience and research, I now know that the biggest reason why coffee tastes too bitter is because the grind sizes are too small for the brewing equipment used, making the brewing time longer than it’s supposed to be. This long brewing time extracts too much bitter flavors from the coffee grounds, leading to a process called over-extraction and produces the bitter cup of coffee.
Aside from that, there are many other subtle reasons why we brew bitter coffee. The list below includes all the reasons I’ve experienced over the years:
- Coffee grind size is too small
- Grind sizes are inconsistent
- Grinder has not been cleaned for a long time
- Beans weren’t flushed before grinding
- Brewing equipment was not cleaned
- Too many beans were used
- The wrong filter size was used
- Brewing equipment wasn’t used properly
- Water temperature was too high
- Water quality was bad
- Brew time took too long
- Unfresh beans were used
- Low Quality Beans
- Bitter Type of beans
- Bitter type of roast
- Changes in our body due to external factors
Let’s take a look at these factors one by one and see how we can remedy each of them.
Coffee Grind Size Too Small
When you look at your burr grinder, there are usually a lot of grind sizes that are written on the settings. An example of this is the entry level Baratza Encore burr grinder, with grind sizes from 1-40, that I’ve been using ever since I started brewing.
Most bitter coffee can be attributed to issues with the grind size because it is the first step in the coffee brewing process. If you grind a size that’s too small, your brew time will take too long and the water will extract all the flavors, including all the oils and all the bitter flavors that comes at the end of the extraction process. This process is called over-extraction, and you’ll most likely come up with very bitter coffee this way.
This solution for this is to use a grind size that’s a bit larger, and one that is suitable for the brewing method that you are using. Below is a table of the initial grind sizes that you’d want to start out with different brewing methods:
|
Brewing Method |
Initial Grind Size |
Grind Setting on Baratza Encore |
|
Aeropress |
Fine |
12 |
|
Hario V60 |
Medium Fine |
15 |
|
Bonmac Dripper |
Medium |
18 |
|
Kalita 102 |
Medium |
20 |
|
French Press |
Coarse |
30 |
|
Bonavita Immersion Dripper |
Coarse |
30 |
|
Cold Brew Coffee |
Extra Coarse |
35 |
I didn’t put in all brewing methods that are known (i.e. Turkish coffee, Vietnamese coffee, espresso, Kalita Wave, Chemex, etc.) because either I have not experimented with them yet. Or I don’t know if my grinder has enough fine settings to grind the required size. I’ll slowly add and edit this list as I gain more equipment to grind and brew with.
Using the table above (while adjusting the grind sizes as you brew each cup) will not only get you very consistent grind sizes, but also assure that you are using the correct grind size for the specific type of brewing equipment that you’re using.
That being said, the table above assumes that you are using a burr grinder. Another popular type of grinding equipment is a blade grinder, and that leads us to our next reason below.
Grind Sizes are Inconsistent
We’ve mentioned that the section above predominantly discusses the grind size using a burr grinder. However, a lot of people use a blade grinder.
Blade grinders tend to come up with more inconsistent grinds as compared to burr grinders. This is because the mechanism used in blade grinders chops up all the coffee beans, but doesn’t take consistency into consideration.
When you leave a blade grinder running for too long. It will not only come up inconsistent grind sizes, but also burn the coffee beans as the blades heat up. This will add a burnt taste to your coffee, aside from the overly bitter taste.
The best solution I would recommend for this is to really invest in an electric burr grinder. We tend to think that they are expensive, but there are entry level electronic burr grinders at the 100 USD range in Amazon that perform well for a starter burr grinder. The electric burr grinder will give you the most consistent grind sizes possible. Entry level grinders will mostly work for home use, from making coffee with Aeropress all the way to cold brew. But you might want to go for more expensive burr grinders when making espresso and Turkish coffee.
If budget is a huge consideration, then my second solution would be to get a manual burr grinder. The best selling, and probably cheapest, manual burr grinder in Amazon goes for below 20 USD, and that’s quite a difference compared to the price of the electric burr grinder.
I personally have a Hario Plus Mini Manual Burr Grinder. The upside with manual burr grinders is that you’ll get consistent grinds as good as an electric burr grinder. It could even grind for powder-like consistency that you need for Turkish coffee. The downside is that it takes a long time, and lots of effort, to grind the beans. It will be okay when grinding coarse sizes, but espresso and smaller sizes will take forever. You definitely wouldn’t want to brew for many people with this, or you’ll grow larger biceps in one arm.
The last solution, if you are staying with a blade grinder, would be to pulse your grind, rather than keep it going for a long time. Pulsing is done by grinding it for a few seconds and then stopping, allowing the beans to jump around the container and be cut by the blade as consistently as possible. The more times you grind, the less time your pulse should be. I’d recommend starting with 3 second intervals, and going down to 1 second intervals until you achieve the desired grind size.
Pulsing will also limit your blade from heating up too much and burning the ground coffee. However, you should still expect inconsistent grind sizes when pulsing, and you will need to have a good eye to know when to stop your grind. This will be especially tricky when grinding medium fine and medium grind sizes.
Grinder has not been Cleaned for a Long Time
No matter what type of grinder you use, they’re all be susceptible to coffee grounds and oil buildup in time. Each time you grind coffee beans, a very small amount of these grounds and oils will stick to the inside container and burrs of your grinder. This inside container can’t be seen from the outside looking in, even if you look inside from the grinder hopper.
Dark roasted beans are especially prone in creating this buildup effect, as they tend to hold more oils and break down into finer, powdery grounds each time you use your grinder.
Although not particularly bitter, these old oils and grounds tend to give out a rancid taste and could affect your coffee by making it stale and tasteless, which you don’t want to have.
The best way to make sure that your grinder is working optimally and not producing a stale, tasteless and rancid taste, is to periodically clean up your grinder.
Set a schedule (i.e. once every 2 weeks for dark oily beans; once a month for medium roasted beans) where you will be taking off the components of your grinder and give it some cleaning. Usually, the easy to remove and clean components would be the bean hopper, gasket, outer burr, and ground coffee bin.
Also, you’d want to send your grinder to an authorized dealer that could strip down your grinder and give all the internal mechanisms some good cleaning and maintenance. You could probably do this cleanup yourself, but these internal mechanisms will need specialists, so I’d still recommend sending if off to an authorized dealer to make sure it’s maintained professionally.
Beans Weren’t Flushed before Grinding
Flushing (or chasing) is done by grinding a small amount of beans and discarding it first, before going for your usual grind.
When Should I Flush my Coffee Beans?
Flushing should be done on one of these instances:
- Changing from one type of coffee bean to a different type
- When you haven’t used your grinder for a few days
- After you’ve manually cleaned your grinder and are ready to grind a new batch of coffee
- After you used cleaning pellets like Grindz
Why Should I Flush my Coffee Beans?
The reason why you need to flush your beans in the grinder is to get all the old coffee grounds out first, ensuring that you extract the best taste out of the new beans that you will be brewing with. You will see differences in the color of the grounds when you flush. And this is especially noticeable when switching between roasts, like dark roast to medium roasted coffee beans, and vice versa.
In the event that you use cleaning tablets like Grindz, flushing assures that all the ground pellets also come out. You will see that there are residual pellet grounds mixed with the ground coffee after grinding the coffee beans.
How Much Coffee Beans Should I Flush?
There really is no exact science to how much you should flush, but I personally use about 2 grams of coffee beans when I flush my coffee. Some of the baristas I’ve seen flush about 5 grams of coffee.
Brewing Equipment was not Cleaned
Another reason why we get overly bitter coffee is because we forgot to clean our brewing equipment. Coffee stains that stay will become really bitter and seep into our next brew. Using pour over coffee makers and immersion drippers are susceptible to this. After brewing, we tend to leave discard the filter, leave the brewing equipment on the counter to cool down, and head off to do something else. On our next brew, we just use the equipment again and that’s where the old coffee stains join in the new brew.
We could also forget to clean carafes. Some coffee stains cannot be easily seen in glass carafes and we forget to clean them up before using them again.
The solution lies more in our habits. We can create a scheduled cleaning time, or rinse and clean the equipment before we use them again.
Too Many Beans were Used
If you’ve already adjusted the grind size, and your coffee is still too bitter, you need to check the amount of beans that you’re using. Sometimes you want to use less beans in your brew to balance out the bitterness and acidity of the coffee.
A good starting ratio is 1 gram of coffee beans is to 15 ml water. You can use the weighing scale to get accurate measurements; and don’t worry about water weight in grams because 1 ml of water is equal to 1 gram of water also.
Below is a small table of how much coffee beans you should grind using the 1g coffee : 15 ml water ratio.
| Desription | Amount of Beans | Amount of Water |
| 1 small cup | 10 grams | 150 ml or 5 oz |
| 1 regular cup | 12 grams | 180 ml or 6 oz |
| 1 mug | 20 grams | 300ml or 10.5 oz |
| 2 cups | 24 grams | 360ml or 12.5 oz |
| 3 cups | 36 grams | 540 ml or 19 oz |
| 4 cups | 48 grams | 720ml or 25 oz |
The table above would usually work for medium roast or medium dark roasted coffee beans.
You’d want to use lesser beans when you’re brewing dark roast coffee. The lowest weight of coffee beans I used for a mug of coffee was 12 grams. The coffee was a really dark blend and was exceptionally strong, so I needed to adjust the amount of beans and have a very slow pour. This goes to show that even when using the table mentioned above, you could still end up using way less beans (or way more with lighter roasts) than you originally started out with.
The best solution to get an accurate weight of coffee beans is to use a weighing scale that can count to the 10th decimal. They don’t need to be necessarily expensive, and they last for years.
Another solution is to use the scoop that has been provided by coffee maker manufacturers with the brewing equipment. This is not accurate though, as the coffee beans in a full scoop will measure anywhere from 8 to 12 grams. Different manufacturers also provide different scoop sizes, which can only make you more confused.
The Wrong Filter Size was Used
I can’t stress enough how important this step is. Filter sizes are meant to fit exactly into their respective coffee makers.
The ridges in different coffee makers are meant to promote airflow and proper water drainage to the attached filters. All these factors were considered in the manufacturer’s plans while developing the product.
You can see this in coffee maker differences like the three-hole Kalita 102, which drains slower and needs a larger grind size, compared to the single-hole Bonmac Dripper, which needs a bit smaller grind size and still brews faster.
Using smaller filters that don’t attach to your dripper’s ridged walls will drain coffee a lot slower, giving you a long brew time and over extracted, bitter coffee.
Make sure you always have the proper filter designed for the specific brewer. You can go for different brands, as long as the filter fits snugly into the walls of the brewing equipment.
Brewing Equipment Wasn’t Used Properly
Most brewing equipments need to be used a specific way. While it’s true that some people find a different way in using brewers from time to time; generally, you’d want to follow the manufacturer’s recommendation in using brewers.
One example I can think of is the Aeropress. If you follow the instructions of the Aeropress, they recommend using 175-degree Fahrenheit (80-degree Celsius) water, fine drip grind, and a 10 second steeping period. If you brew away from these parameters (example: water is too hot or steeping for a lot more than 10 seconds), you’ll come up with very bitter coffee.
As the saying goes, practice makes perfect. We can’t expect to get it all right on our first brew. But the more we use a specific brewer, the better we become at brewing with it and the better our coffee will taste.
Water Temperature was Too High
Water temperature has a huge effect on the outcome of the coffee. You can literally burn the beans if you use a very high temperature. There are two tastes that could come out with using water that’s too hot. One is that your coffee will have a burnt taste. The other is that the beans will over extract and give you a bitter taste. Most of the time, you’ll have the two tastes combined.
The optimal temperature range for brewing coffee is 195 to 205 degrees Fahrenheit. (91-96 degrees Celsius). This range will allow the heated water to extract the coffee grounds correctly. If your water temperature is too hot, you’ll burn and over extract your coffee. If it’s too cold, you’re water couldn’t extract the correct flavors and you’ll end up with under extracted, sour coffee.
Some other brewers need an even lower temperature, like the Aeropress, which recommends a water temperature of 176 degrees Fahrenheit (80 degrees Celsius).
With all these variances in temperatures, it’s best to get your hands on a digital thermometer to make sure that you’re getting the correct temperature all the time. However, you’ll need to be careful with these thermometers as you could slightly burn your hands if you position these thermometers over the steam.
Another reliable, but more expensive type would be the laser thermometer. These are as accurate as the digital thermometers, and allow you to check the temperature at a farther distance than the classical digital thermometer.
Other products that you could use are temperature control gooseneck kettles. These are more pricey, but already puts three products into one. These products are a water boiler, gooseneck kettle, and thermometer. If you add up all the investments that you’ll make, getting one of these seems a lot cheaper than getting them all separately. If you don’t have a gooseneck kettle and thermometer yet, this is an easy investment.
And finally, if you are thinking that you wouldn’t want to spend a single dime on a thermometer. I fully understand. I went a few years without getting one too. Here’s the oldest trick in the book: After boiling your water, leave it for 30 seconds before using it. This should lower the temperature and get you to within the range that you need.
The method above works for the 195-205 degrees Fahrenheit range, but will not get you to Aeropress temperature. I don’t actually know how to get to the 176-degree Aeropress temperature without using a thermometer.
Another issue with the 30 second theory is that it doesn’t work in all situations. Do you live on a higher plane, or at sea level? Colder climate or near the equator? You can see from these factors that the cooling down of boiled water could be faster or slower, and can’t be accounted for properly. I’d really suggest the thermometer or the temperature control gooseneck kettle. Those will surely give you accurate readings.
Water Quality was Bad
Thanks to modern engineering, we could get water through our faucets without really thinking of the source. However, water treatment plants have different treatment procedures, and water quality varies from place to place. Because of this, it’s fair to assume that the water coming out of our tap is also of different qualities, some will have hard water, which contains a lot of minerals, while others will have softer water, which has less minerals.
The ideal water quality used for brewing coffee (with the exception of espresso) is water that has a few mineral contents in it. And so, using tap water might not bring out the best quality of your coffee. Rather than being bitter, it might taste quite flat and underwhelming.
This is where water filtration systems come into play. They tend to lessen the mineral content of the hard water and produce water that’s just right for brewing coffee (water with fewer minerals).
The next time you brew your coffee, run it through a water filtration system first. Simple ones like Brita water filters are perfect for this job.
Brew Time Took too Long
You want to have the correct brew times, no matter what brewing equipment you use. But to get this correct brew time, you would need to go through a combination of grind sizes, amount of coffee grounds, brewing equipment, paper filter attachment, pouring style, and pouring intensity. If all these factors fall into place, you should have the correct brew time. There are coffee makers that are a bit more forgiving with the brew time (like the Kalita 102 and Bonmac Dripper), but some other makers are really strict with the brew time (like the Hario V60).
If you brew for longer than the recommended brew time, your grinds are probably too small and you need to grind coarser beans in your next brew.
With the Hario V60, not only do you need the right grind size, but you also need a really slow and steady pour to get the correct brew time.
To help you with the brew time, I’ve created a table below that contains my experience and research in brewing coffee using different methods.
|
Brewing Method |
Brew Time for a cup (150 ml) |
Brew Time for a Mug (300 ml) |
|
Aeropress |
10 seconds then press |
10 seconds then press |
|
Hario V60 |
2 minutes 30 seconds |
3 minutes |
|
Bonmac Dripper |
2 minutes |
2 minutes 20 seconds |
|
Kalita 102 |
2 minutes 20 seconds |
3 minutes |
|
French Press |
5 minutes |
5 minutes |
|
Bonavita Immersion Dripper |
5 minutes |
5 minutes |
|
Cold Brew Coffee |
24 hours per batch |
24 hours per batch |
If you’re brew is taking too long, start with looking at your grind and make it coarser.
If it doesn’t change, check if the filter is attached snugly to the ridges of the brewer.
If it still doesn’t work, you might need to pour a little more aggressively, or add water faster when you brew.
Grind size and technique will start to matter at this stage, especially with making pour over coffee. Start with the recommendations above and you should get your desired brew time.
Unfresh Beans were Used
After roasting, coffee beans start emitting carbon dioxide, and starts losing its flavors. However, there is a timeline where you want to start brewing your beans. Brew them right after their roasted, and the carbon dioxide hasn’t had enough time to escape, making your brew under extracted, and resulting in a flat or sour cup of coffee.
Freshly roasted coffee beans are best used at about 4 days after roasting, giving the carbon dioxide enough time to degas. Now your brewing method should be able to extract the optimal flavor from your coffee beans
However, leave it stored for too long, and the flavors start to seep out. Brewing coffee about a month after you’ve opened a pack will give you a variety of tastes per pack. Some will taste bitter, some sour, others flat. Sufficed to say, most of them will taste downright bad.
The way around this is to always make sure you have the freshest beans possible, and target to finish your coffee bag around a month’s time. 400 to 500 gram-packs of coffee per person, drinking 2 cups of coffee per day, is a good starting point.
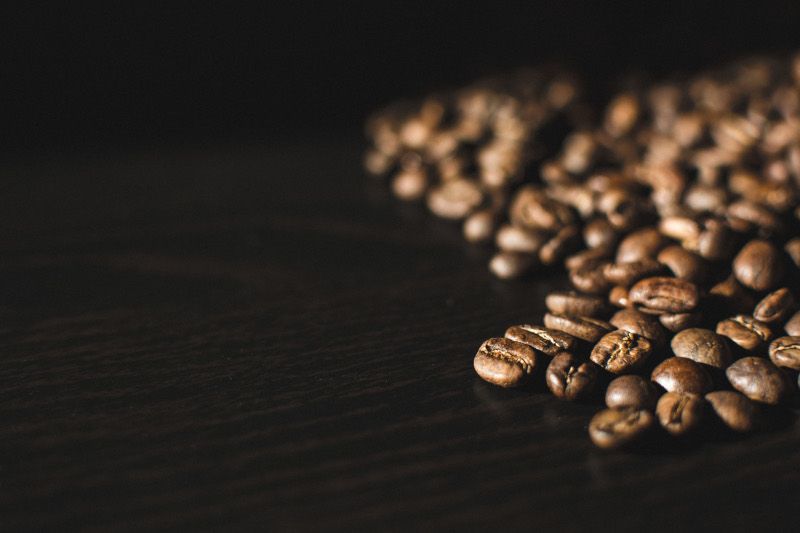
Low Quality Beans
Though most brewers would consider this as the first consideration, I decided to place this at the end. As consumers, we really don’t have much control in our coffee quality. All we can do it buy the pack, hope it tastes well, and gain some experience over time as to which brands are good and which ones to stay away from.
I remember I bought a breakfast blend coffee a few years ago. Opening the pack after i got home, I saw that the roasts were inconsistent. Some beans were light colored and the others were dark colored. I tried to make a cup, and the taste was really awful. My coffee was not only bitter, it was earthy. It was so bad that it felt like drinking grass. The beans weren’t only roasted inconsistently, there were also of low quality, as some beans were halved, while others were chipped.
My best recommendation would be to continue buying from your trusted brands. Some people like to keep going back to local roasters, others trust established long time brands. The preference doesn’t matter. We all have our different likes about coffee. Some like single origin, while others like blends. Stick to the brand or roaster that you like, and dare to explore from time to time. I personally switch between single origin and blends. Sometimes I like the citrus tastes of single origin coffee, but yearn for the bolder tastes of blended or dark roasted coffee afterwards. So there is no right or wrong. Follow your palate and make sure you’re getting your coffee from quality roasters.
Bitter Types of Beans
Let’s simply categorize coffee beans under the two most popular types used globally – arabica and robusta.
Focusing solely on taste, arabica coffee beans usually have a more citrus and acidic taste; and robusta coffee has a bolder, more bitter, and earthy taste.
When we say single origin, it means that the coffee came from a single area of cultivation and harvesting.
Blends have a more traditional approach. Coffee roasters who make blends use a variation of robusta and arabica coffee beans, which are possibly sourced from multiple areas. They mix these different coffee beans together and come up with a taste that balances out the acidity and bitterness of the coffee.
Depending on the pack of coffee you bought, you could possibly end up with a very bitter earthy taste. This occurs when roasters create blends that have too much robusta coffee beans in them.
Single origin beans could also produce a bitter flavor, albeit the general consensus that they produce a more citrus taste profile. Places like Hawaii, which make Kona coffee, produce a strong, bold, and more bitter coffee flavor, compared to other arabica coffee beans.
There really is no easy solution for this as each pack of coffee produces a different taste profile. And we tend to finish each pack of coffee we get rather than throw them away and go for a new pack right after.
Rather than throwing the pack away, we can control the way we make coffee. Use the grind size and amount of coffee charts recommended in the sections above and adjust as you go. You will most like need to go for coarser grounds and less grams of coffee.
If you don’t like bitter coffee, stay away from pure robusta coffee as it makes some bold and bitter coffee. But it’s also important to mention that high quality robusta beans are in high demand for espresso shops as it produces some of the best espresso in the market. Robusta beans have their own market, but maybe it’s just not for you. Go for arabica beans or blended coffee beans instead.
Lastly, if you have the need to finish your coffee and do not want to waste the cup you’ve made, you can add a little salt to lessen the bitterness. Or you can also add some milk to lessen the bitter taste as well.
Bitter Type of Roast
Different roasts will extract different flavors from the coffee. Generally, there are light, medium and dark roasted coffee.
Light roasts will extract a more citrus and more sour flavor from the coffee. Medium roasts tend to produce a more balanced taste, while dark roasts will eliminate all citrus flavors and enhance the bitter profile. Add in the type of beans section we discussed above, and you will be left with a lot of taste variations.
If a fresh pack of coffee is too bitter and the beans are really dark, chances are that the coffee shop you bought from has roasted some dark roasted beans.
Go for medium roasted or medium dark roasted beans. These will lessen the bitter taste profile of the pack and will hopefully give you a more suitable cup.
Add in some variations like lessen the amount of beans, grind larger chunks, and target a lower brew time so you can adjust the current pack of coffee to your taste.
Changes in our body due to external factors
Some coffee enthusiasts sometimes share that their coffee suddenly becomes very bitter without changing anything in their coffee beans and their brewing method. This case could happen when there have been changes in lifestyle that could alter their taste buds.
A good example of this is when you change medication. Some medication could change the way we taste things, enhancing some tastes while dampening others. Think of it as eating mango, and suddenly eating pineapple right after. The mango has already coated your mouth with a sweet taste, and the sudden introduction of the pineapple will heighten the sourness of the pineapple.
Changes in taste due to changes in medication will tend to leave a longer effect as medicine introduces a internal change in your system. But we’ll leave the discussion up to there only, as medicine is a very professional topic that I am not suited to discuss deeply.
That being said, if you’re experiencing any sudden change in the bitterness of your coffee, but have been drinking coffee for a long time, you’d want to observe anything that has changed in your environment like lifestyle changes, medication, and diet.
If you can’t make changes to the external factors, but still want to (or need to) have your coffee daily, switch up your brewing method.
In my experience, the brewing method with the most subtle taste is the cold brew method. This will give you a less bitter brew, and would hopefully get to back to enjoying your coffee.
Conclusion
Brewing coffee is a unique experience. For people who like to manually brew their coffee, the experience is somewhat therapeutic. We all want to make great cups of coffee all the time. But sometimes, we can’t help coming up with bitter brews.
The list above has items that explained why our brewed coffee could taste so bitter. I hope that the reasons have helped you in pinning down why your coffee is bitter. More importantly, I hope that the recommendations helped you out even more. If you have any experiences, comments, or suggestions you want to share, I’d really appreciate you leaving a comment below.
Thanks for taking the time to read this article. Again, I hope it was of great help and value. And I’ll see you on my next article!